Automate your home with a Shelly 1 Wi-Fi module
Shelly is a company producing Wi-Fi-enabled home automation tools like socket plugs, sensors, and tiny modules to put behind an existing switch. All their products can be organized using the Shelly Cloud app on your phone, but you can also use your own home automation system. You can configure timers, schedules, and many more things using this app. The app isn't mandatory, because the products itself have a web interface themselves with the exact same configuration options. No vendor lock-in!
Shelly 1
The Shelly 1 is a small Wi-Fi enabled switch you can put behind an existing switch that costs only € 10,00! Because it's only 41 x 36 x 17 mm it fits almost everywhere and it supports up to 3500 Watt. Another pro is, if you put it behind an existing switch, the existing switch will still work because the Shelly 1 does have an extra input line to detect whether the switch has been used (WAF +++).
Let's start to automate some stuff: my back door and front door lights
I'm annoyed to manually switch on the back door and front door lights when the sun goes down. The Shelly 1 is going to automate this for me! I put the Shelly 1 behind the existing switches so my wife can still operate the switches manually. I'm not an electrician but I've some basic know-how and it worked the first time, so I think that everyone can do this, but if you don't feel confident, don't and ask help from an electrician. First... the manual! Where I live, in The Netherlands, we've 230V. Check the jumper on the Shelly 1 and make sure it is in the right spot as shown in the diagram below.
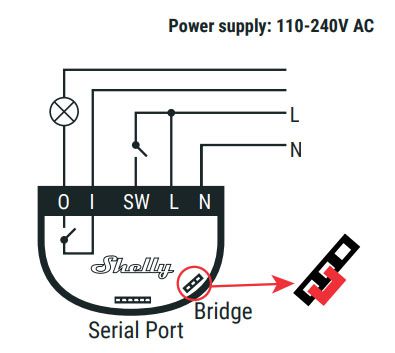
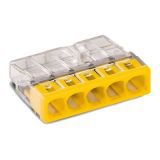
If you don't do this you will get some fireworks and the Shelly 1 is an R.I.P. The diagram above shows us how we've to connect the Shelly 1 to the light, the switch and it shows us that it needs a neutral input and line input. In most cases, you don't have a neutral input behind your existing switch so you've to fix that first. In my case, I've added the neutral line when I renovated my home so I'm good to go. We also need to connect two extra line inputs needed to power the Shelly 1 and for the relais in the Shelly 1 (the "I" in the diagram above). I'm using terminal connections (WAGO, "verbindingsklem" in Dutch) for this.
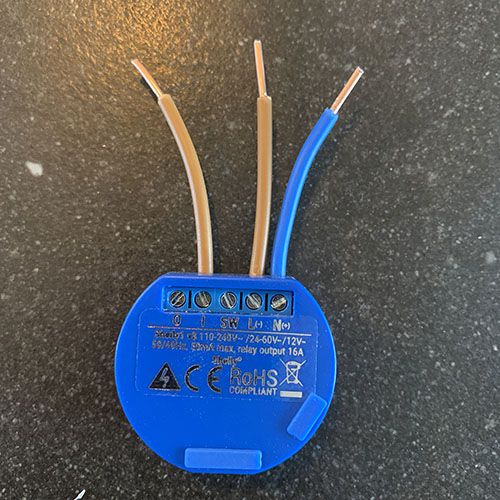
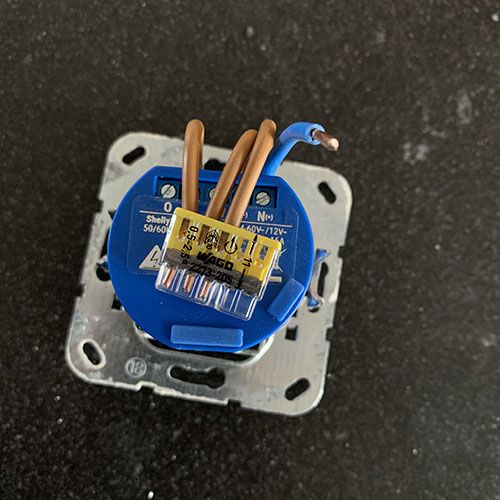
First, I add three short cables to the Shelly 1: one to the "I", one to the "L" and one to the "N".
CAUTION!!! This is the moment to disable the power to the switch you're going to automate!
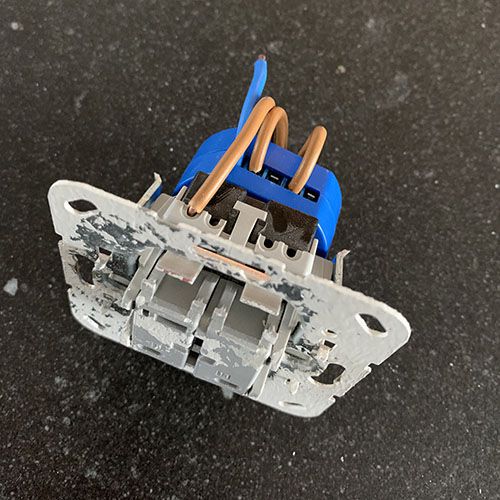
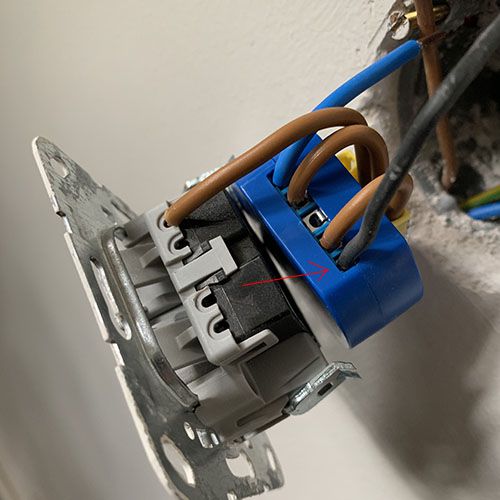
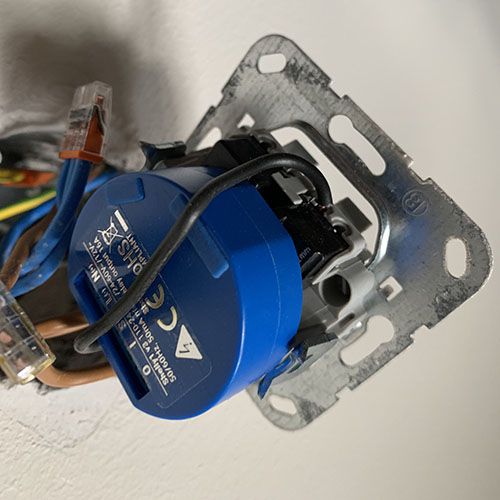
In the second step, I already brought the existing switch and Shelly 1 together. I've done this because I don't have a lot of space behind the existing switch and now I can stick the Shelly 1 at the back of the switch to be as efficient as possible. You can see that I've connected al the input lines using a WAGO connection terminal. The switch also needs an input line so you can still operate the light manually.
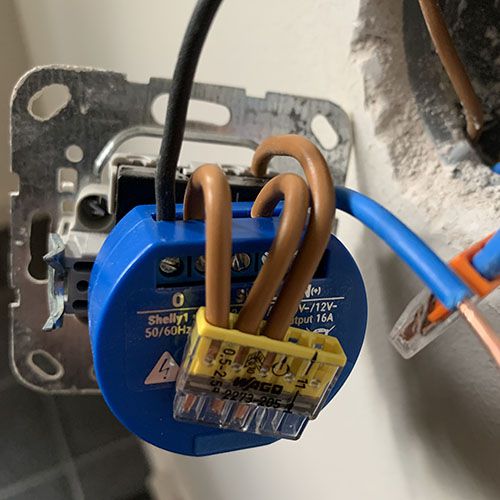
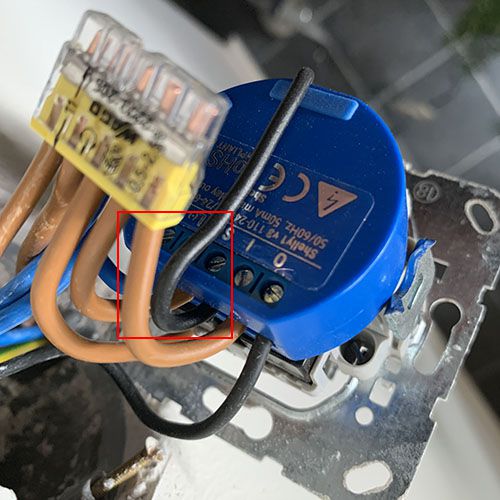
Now connect the wire which goes to the light to the "O" of the Shelly 1 (it's the black wire in the images below).
We still have to connect the neutral line. Again, I'm using a WAGO connection terminal for this.
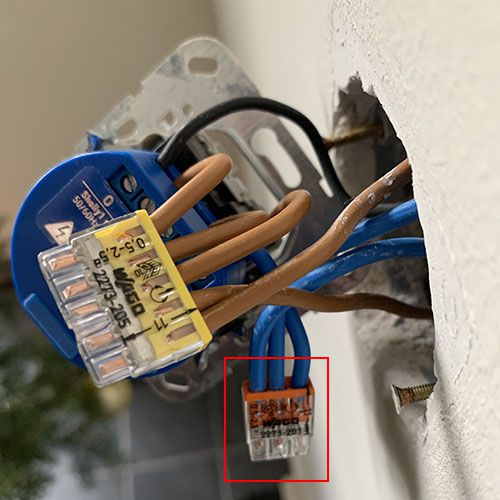
Last but not least, connect the output of the switch to the "S" input of the Shelly 1.
That's it! Get everything back in the box and re-enable the power.
Get the "Shelly Cloud" app from the App Store or Google Play Store. You need to create a Shelly Cloud account before you can manage your Shelly device using the app. After logging in, Android devices will already search for Shelly Wi-Fi SSIDs. This isn't supported by Apple so when you're using an iPhone or iPad you've to connect to the Shelly 1 Wi-Fi network manually.
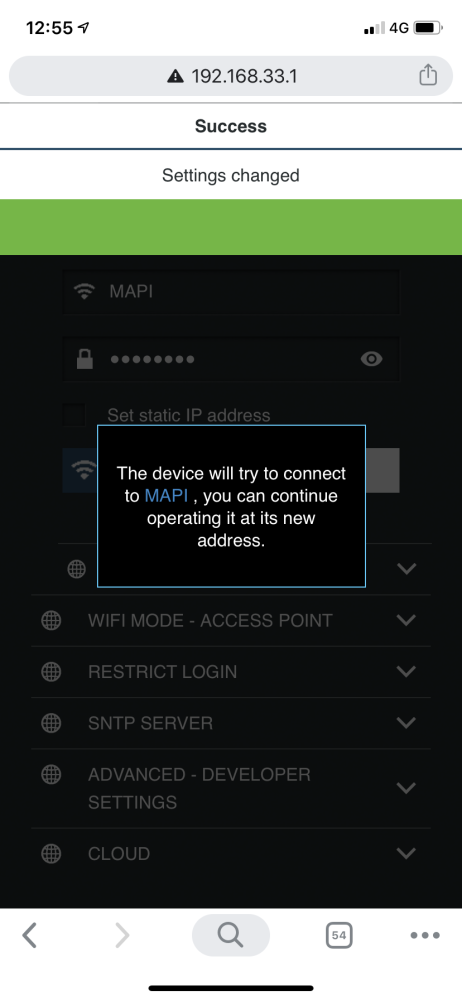
Interruption... in my case, I couldn't find the Shelly 1 device after I've connected to the Shelly 1 Wi-Fi. To resolve this I've configured the Shelly 1 manually using the web interface of the Shelly 1 device itself.
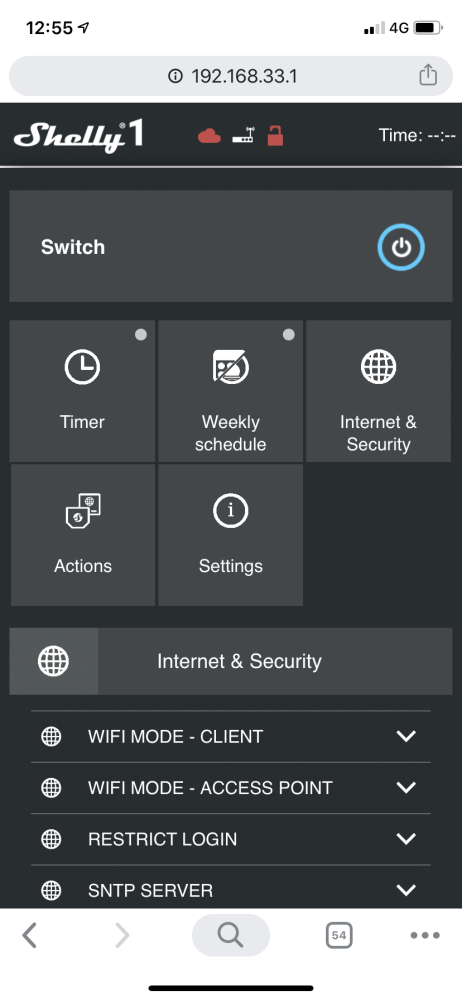
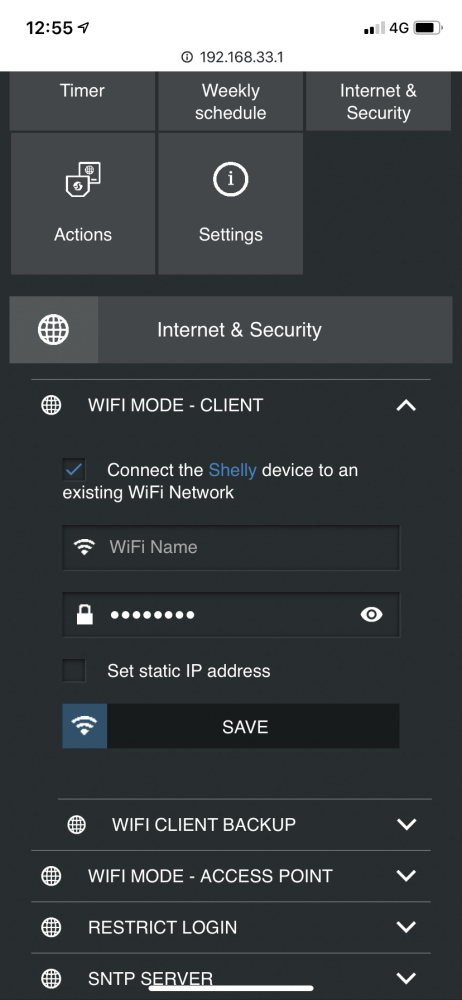
The IP address of my Shelly 1 is 192.168.33.1. After opening the web browser and going to http://192.168.33.1 I'm able to configure the Shelly 1 without any further issues as you can see in the screenshots below.
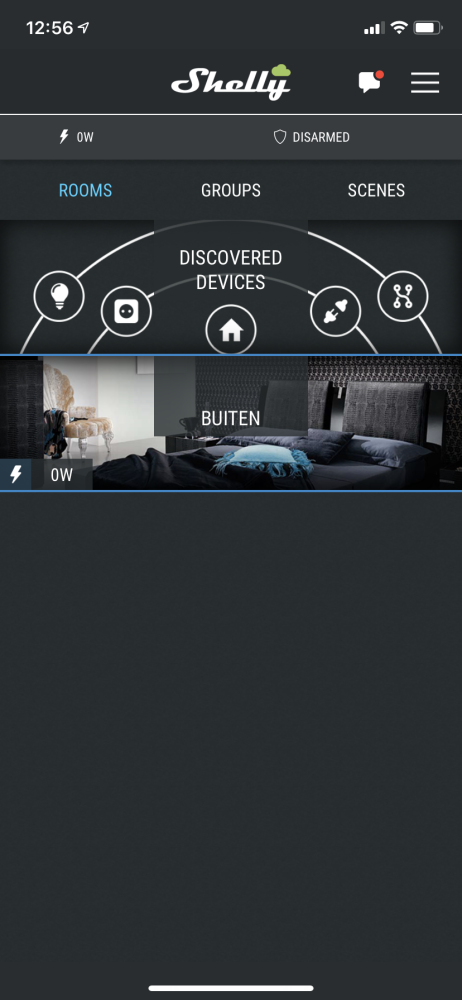
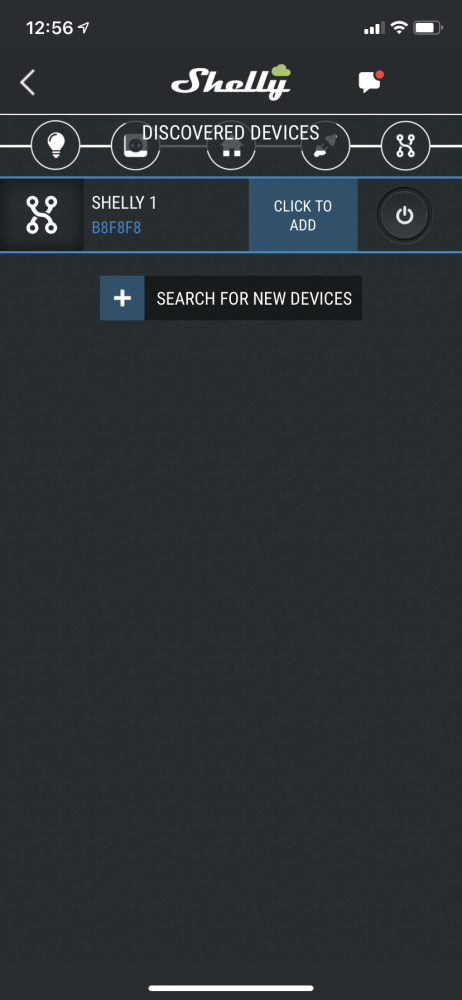
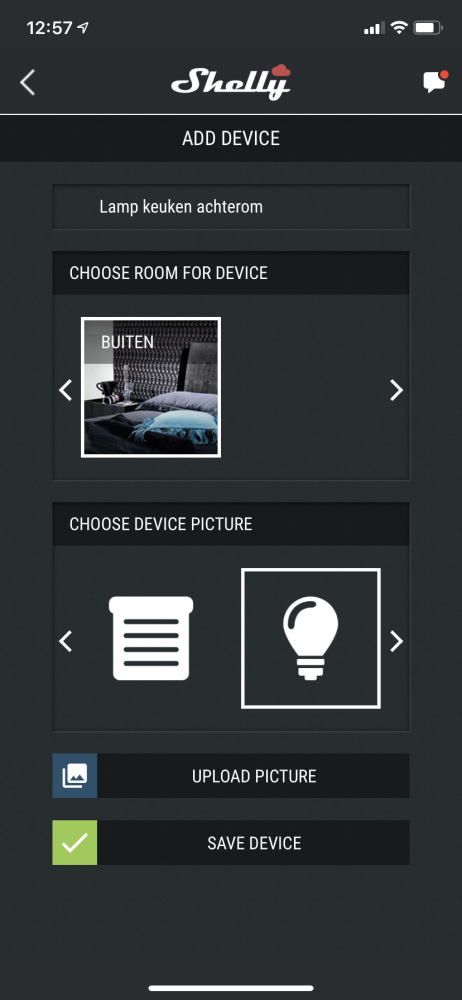
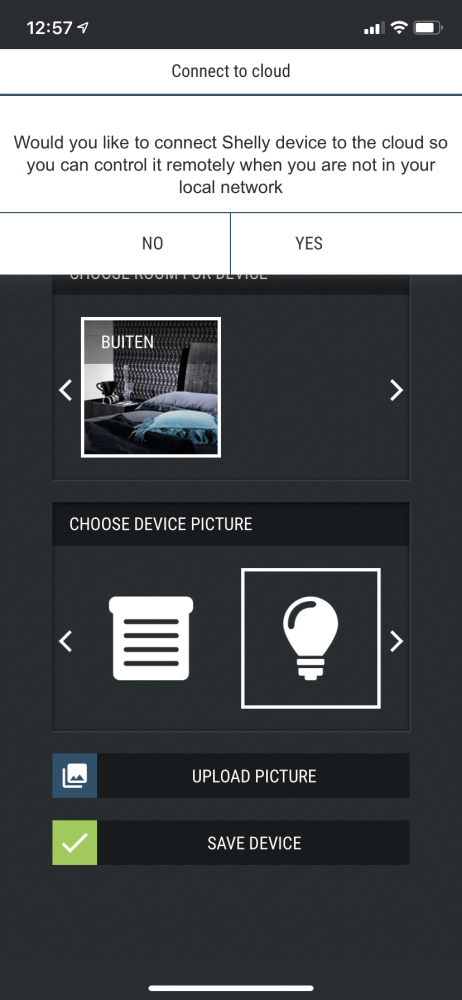
After I've added the Shelly to my local Wi-Fi network I was able to find the device using the Shelly Cloud application. Hit the "Discovered Devices" image to add a new device. When you add a new Shelly device you only have to provide a name and location (room). You can't add the new device if you don't have any rooms so make sure you've created a room before you add the Shelly device. After you've added the new Shelly device, you get a popup asking if you want to enable cloud services for this device. This is totally up to you!
And you're done! The Shelly 1 is added to your Shelly Cloud account and can be optionally controlled all over the world. I've added scheduled to the Shelly devices to automatically power on the lights when the sun goes down and to power off when the sun rises, and still can control the lights using the old-fashioned way.
Thank you for reading and good luck with your own home automation project!