Short introduction to Hashicorp Terraform Cloud (Free) and AzureRM
Terraform Cloud is free for individuals and smaller teams that don't need the premium features like policy as code or self-hosted option. Create an account by going to terraform.io and click on "Sign up for Terraform Cloud". An email is sent to your emailaddress with a link to confirm your account and to get started with Terraform Cloud.
When you first login to Terraform Cloud, you will be asked whether you want to start from scratch or not. I choose the option to start from scratch and created my organization "pimwiddershoven" on Terraform Cloud. As the organization is configured, you've to create a workspace. You've three options: Link a VCS project, link your local Terraform CLI, or go advanced and use the API. I've created a new project on GitHub called "terraform-cloud-azurerm" and linked that VCS project to my new workspace. If everything went right the first time, your Terraform Cloud environment has now a single organization and single workspace.
As already mentioned, I've created a new project on GitHub for this blog post. It only consists of a default README, .gitignore file, and LICENSE (MIT). No Terraform code is present yet, so let's start with the first configuration: the backend. The Terraform backend is a mandatory configuration and configures the location Terraform stores your state file. Terraform Cloud is able to do state management for us, so we're going to configure that first in a backend.tf file.
backend.tf
terraform {
  backend "remote" {
    organization = "pimwiddershoven"
    workspaces {
      name = "terraform-cloud-azurerm"
    }
  }
  required_version = ">= 1.0.5"
}
The backend is configured, but the plan detects no changes because we didn't add any resources. For this blog post, we automate provisioning of Azure resources. I already have my own Azure tenant where I will create a new App Registration that will be used for authentication and authorization purposes. To create an App Registration in Azure, go to Azure Portal -> Azure Active Directory -> App Registrations. Give the new App Registration a name (i.e. terraform-cloud-azurerm), choose the "Accounts in this organizational directory only" account type, and click on register. When the App Registration has been created, create a new secret and copy the secret before leaving the page.
Now we have a App Registration, we are required to make it available from within Terraform Cloud. On my own laptop, I would set some environment variables. For Terraform Cloud we're able to set these environment variables too by going to the "Variables" tab. Add the following environment variables to Terraform Cloud:
ARM_CLIENT_ID       = Client ID of the App Registration
ARM_CLIENT_SECRET   = The secret of the App Registration (mark sensitive)
ARM_SUBSCRIPTION_ID = ID of the Azure Subscription
ARM_TENANT_ID       = ID of the Azure Tenant
The App Registration is ready to use! To grant access for this App Registration to a subscription, add a role binding that grants the App Registration Owner permissions to the default subscription. Do this by going to the default subscription in the Azure Portal and click on "IAM" where you're able to add a new role binding.
The AzureRM provider is used to provision resources to Azure. For this short demonstration we're going to provision a single resource group. Add two more files to the repository. The first file is the provider.tf that is used to configure the AzureRM provider, and in the second file main.tf, the first resource is defined.
provider.tf
terraform {
  required_providers {
    azurerm = {
      source  = "hashicorp/azurerm"
      version = ">=2.88.1"
    }
  }
}

# Configure the Microsoft Azure Provider
provider "azurerm" {
  features {
    resource_group {
      prevent_deletion_if_contains_resources = true
    }
  }
}
main.tf
resource "azurerm_resource_group" "my_first_rg" {
name = "pimwiddershoven-rg"
location = "West Europe"
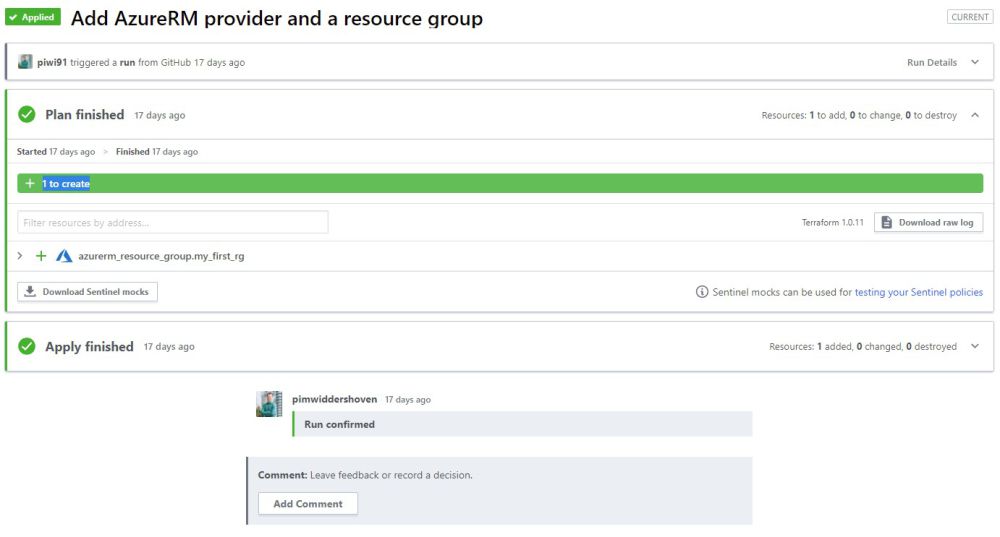
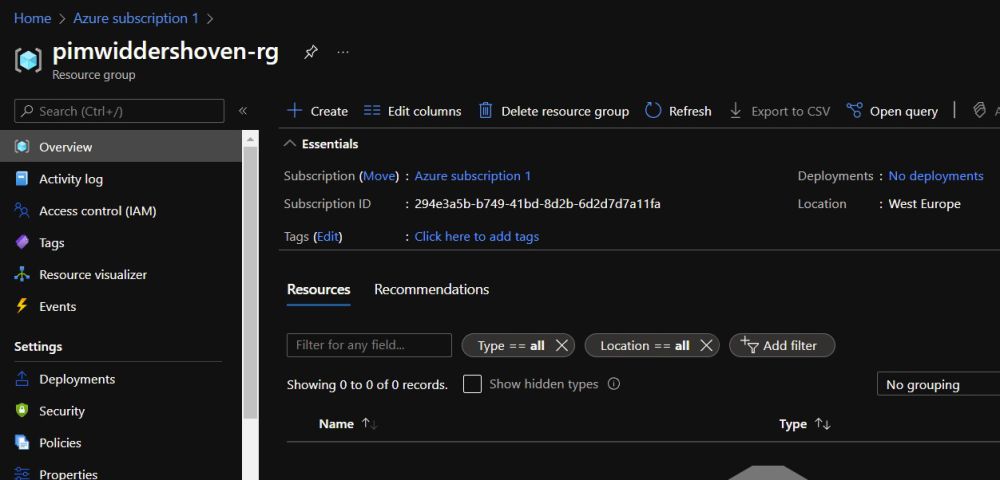
}Commit the changes, and go to Terraform Cloud again. Terraform Cloud is already planning changes. Click on "See details" to open the plan where it shows us that Terraform wants to deploy a new resource group. It needs confirmation because Terraform Cloud won't automatically apply changes (this is an option though). Click on "Confirm & Apply" to apply your first plan! A few seconds later, the plan has been executed and the resource group is created in Azure.